Thursday, December 8, 2011

Schedule for Winter Break

Week 1 - Dec 11 to Dec 17
Set Fabrication

Week 2 - Dec 18 to Dec 24
Page 3, Shots 19 to 26

Week 3 - Dec 25 to Dec 31
Page 3 and 4, Shots 27 to 33

Week 4 - Jan 1 to Jan 7
Pages 4, 5, and 6,  Shots 34 to 47

Week 5 - Jan 8 to Jan 14
Page 1, Shots 1 to 9, Any Reshooting Necessary

Week 6 - Jan 15 to 17
 Organize footage for return - compile that junk

Tuesday, December 6, 2011

Update 12/6


Heads are finally painted! Yeah! The silicone was giving me some trouble, but ultimately it conformed to my ways.

After getting the lights from Jill on Wednesday, I conducted a lighting test and a small animation test to see if my magnetic tie-downs were going to work. Unfortunately, magnets are a great idea until you puppet lurches mid-scene, so I will be using the traditional drilled-hole tie-downs. Hopefully because his feet won't be viewable much in the storyboard this will not be too difficult to work around.

With the lights I really like the LEDS in terms of clean, unwavering light quality. The lights are very blue though, and I spent a bit of time in iStopmotion doing some in-program color correction. In the actual project I may just let the light be and adjust all the color later in After Effects. For some reason both Youtube and Vimeo are bogged down right now, but there will be in the near future.

Also my site is looking good. Check it out: http://jessiekotis.com. I spent my time making my site look LEGIT. I also spent a good amount of time readying my video files for the web, compressing some stuff I've been meaning to (Digital Cinema Stuff).


Tuesday, November 29, 2011

Thanksgiving Break Update

So, I got the room secured for shooting over break. The room itself is 16x20 ft, so it's very spacious and can be completely occupied by my set. It is can also be locked and is away from everything in the house, so it is really a perfect space.

I also continued to work on my website and tighten up the coding. On Friday I secured my domain and hosting space and have been tweaking the layout ever since to get ready for the web.

As far as progress on my actual BFA, I am still behind. I know that where I am supposed to be today I will be on Thursday. I have purchased all my materials for my set and should be all caught up by Thursday. Even though I am not presenting in class today due to various personal reasons, I am here to give my support and feedback to my peers.

Tuesday, November 22, 2011

Progress Thus Far, Part 4

 2-Part Epoxy Skull wrapped in bandage to give the silicone something to stick to

Success! Frank's head is looking good.

First casting of Agness's head. A large air bubble formed in the silicone right in the jaw, the worst place possible,  rendering this casting useless.

Another angle of the damage :(

2nd casting of Agness's head. Though not a horrible as the first, her jaw is hollow and wrinkles badly when mouth is open. One her eyes also migrated from the socket during casting, causing the socket to form higher up in the eyelid.

Another angle of the hollow spot. May have to recast, may be fixable by adding more silicone into the pocket and hoping it sets properly. Same can be said for the wonky eye socket.


Sewing! This is where I work. Clothes are coming along well, but ultimately are unfinished.  Just more work during Thanksgiving and tonight.

Casting! This is the other place I work. After making alterations to Agness's second head, those silicone paints in the bottom right corner are going on asap!
Ultimately I was set back again by technical mishaps, but I have the rest of the week to devote finishing the puppets. It will happen, I swear!

Thursday, November 17, 2011

Progress Thus Far, Part 3


Hers
His


Molds are finally done, hooray! The vaseline release agent worked and now I have two lovely molds for casting the silicone. Most of the keys broke off as I was too impatient to let the mold halves cure fully (24 hours just wasn't long enough), but both molds fit together very well and all the impressions took cleanly.

I am still scraping his mold for leftover sculpey, as he had a lot more crevices than her. Once they are both thoroughly cleaned I can pour the silicone tonight! Additionally I need to make the skulls that will be inside the silicone, but it is not wise to make them before the mold
is cured, as you want to ensure a snug fit. Their heads will be done this weekend and I cannot wait. Huzzah!

Together at last
Carnage!

Tuesday, November 15, 2011

Progress Thus Far, Part 2


Progress Thus Far

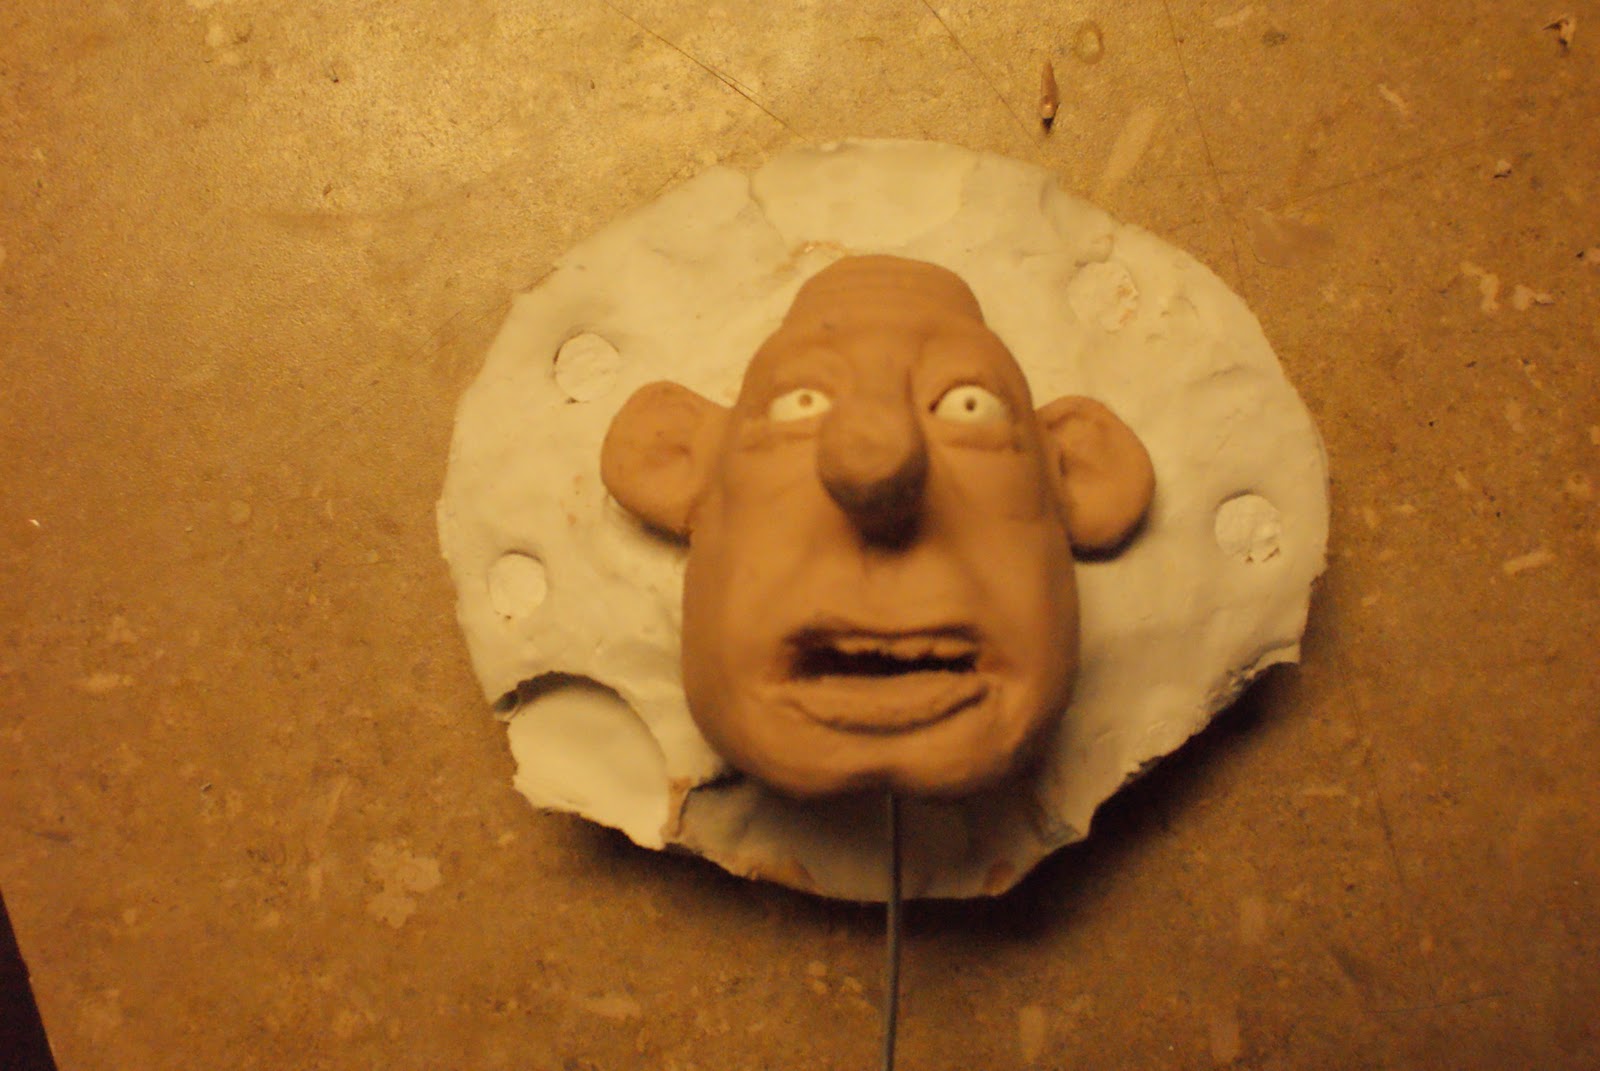
So at the beginning of the casting process I laid the head in a bed of plasticine (oil-based, non-drying clay) up to the ears, an area that will eventually become the seam line. I placed wire into the eyes and mouth in order to reinforce the plaster that would be poured there. I also added 'keys' to help align the mold later.


 I also made a wall of plasticine around the bed contain the plaster as it dries. From there I applied plaster with a brush into the crevices of the sculpt to allow for better detail capture.
Then I poured the plaster into the mold casing and allowed it to dry for 24 hours (the recommended time). Otherwise the plaster is too soft and crumbly for the other side of the mold to be complete. For the other side of the mold, I used the same process: plasticine walls, poured plaster, allow to cure. I also used a soap and water mold release, as suggested by the good people of the internet.
 Unfortunately, when it came time to pry apart the mold halves, they would not budge. After much sawing and prying, the mold remained hard as a brick. I could only surmise that the release agent did not work and the two halves stuck together, incasing my original sculpt inside.
This was pretty bad because it meant not only all those hours of mold-making were lost, but that my original was now encased in a block of plaster, meaning I would have to resculpt his head. Not eager to make the same mistake twice, I then made some smaller dummy molds to test different release agents. 
One was made using the soapy water method as before to make sure it wasn't a fluke, and the other was with vaseline, which while being the right consistency for release can sometimes add too much bulk between mold halves.


 After letting both molds sit, I found that the vaseline worked beautifully even though the keys broke off (I didn't let the plaster dry fully in order to see more immediate results). The soapy water release stuck together like the first mold and confirmed that it sucked. Armed with new knowledge, I began again.
Now the irony is that a full 24 hours after my attempt to pull apart the original mold, I sat down to document my failure. And wouldn't you know it, I could finally pry the mold apart. Now, the mold was still damaged and unusable, but at least I could salvage most of my original sculpt, which was a definite plus. If the mold halves had met together and didn't have big openings around the seams, I probably could have worked with this shitty mold, but I really don't need to waste more time.